Why Good Design Matters
Before diving into the tools, it’s crucial to understand the “why.” Good design is about effective communication. For TEDx, while the classic Red, White, and Black is iconic, understanding broader design principles allows for more creative and impactful visuals.
Part 1: Understanding Color
Color is one of the most powerful tools in a designer’s arsenal. It can evoke emotions, draw attention, and create visual harmony.
RGB vs. CMYK: Digital vs. Print
At its core, how we perceive color depends on the medium.
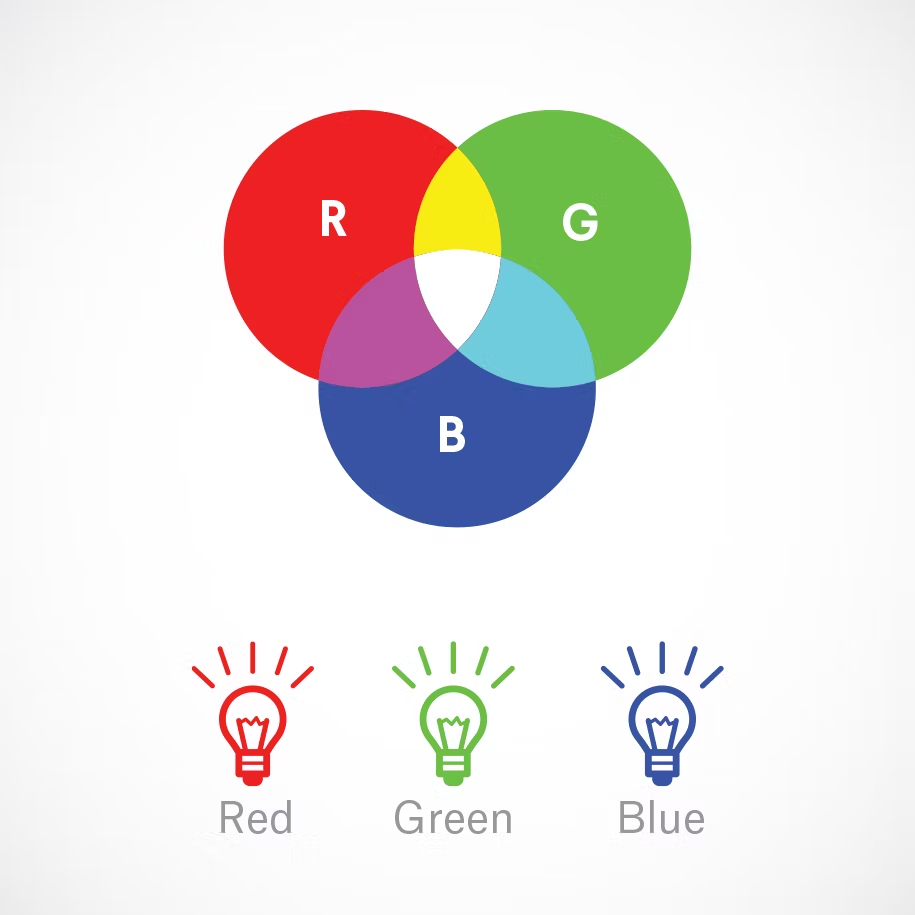
- RGB (Red, Green, Blue): This is the additive color model used for digital screens. It starts with black and adds colored light to create the spectrum. The more light you add, the brighter the color. When red, green, and blue light are combined at full intensity, they create pure white light. Think of it as mixing light waves, which is how our eyes perceive color.
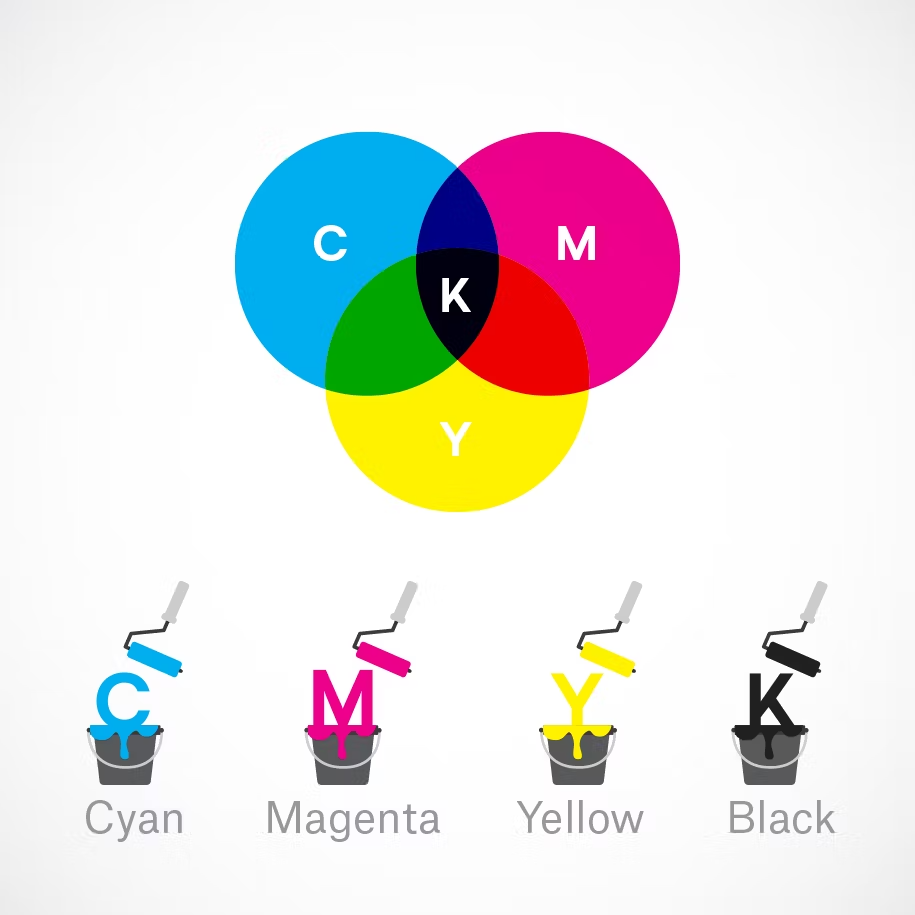
- CMYK (Cyan, Magenta, Yellow, Key/Black): This is the subtractive color model used for physical printing. It’s called “subtractive” because you start with a white surface (like paper) and subtract light by adding ink. Printers use these four colors to produce a vast range of hues on physical media.
The Color Wheel: Your Guide to Harmony
The color wheel is a fundamental tool for combining colors effectively.
- Primary Colors: Red, Yellow, Blue.
- Secondary Colors: Green, Orange, Purple (created by mixing primary colors).
- Tertiary Colors: Created by mixing a primary and a secondary color (e.g., blue-green, red-violet).
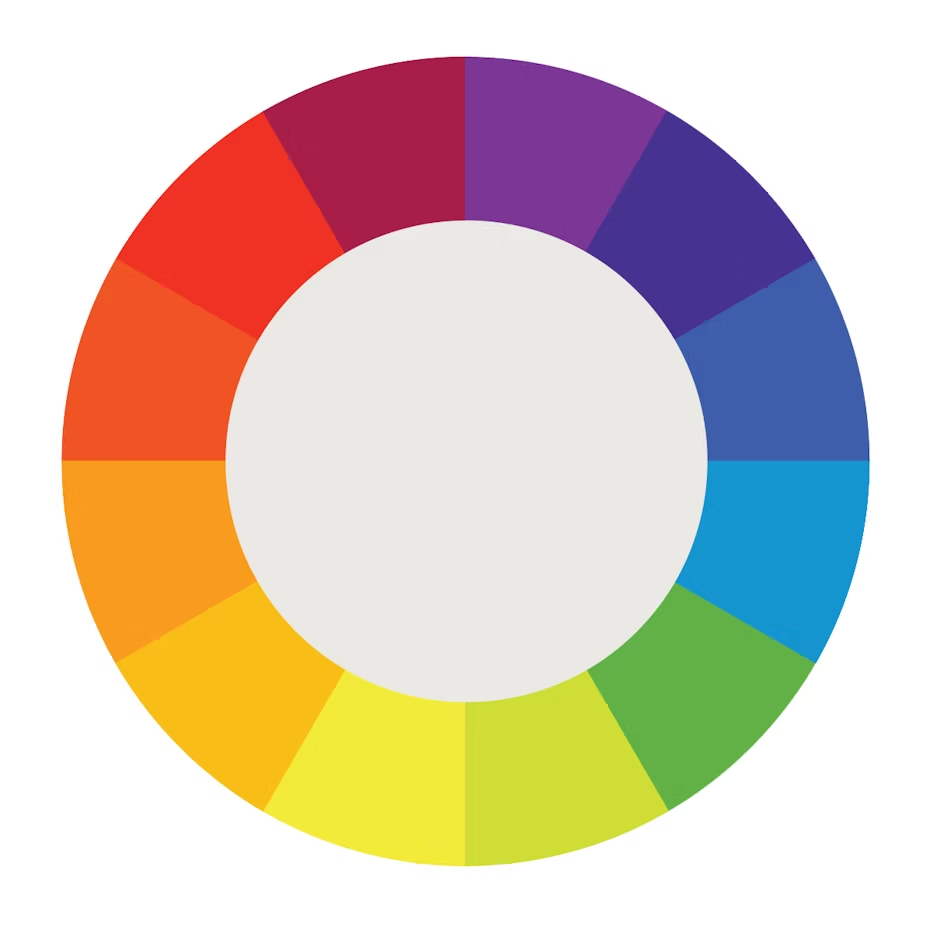
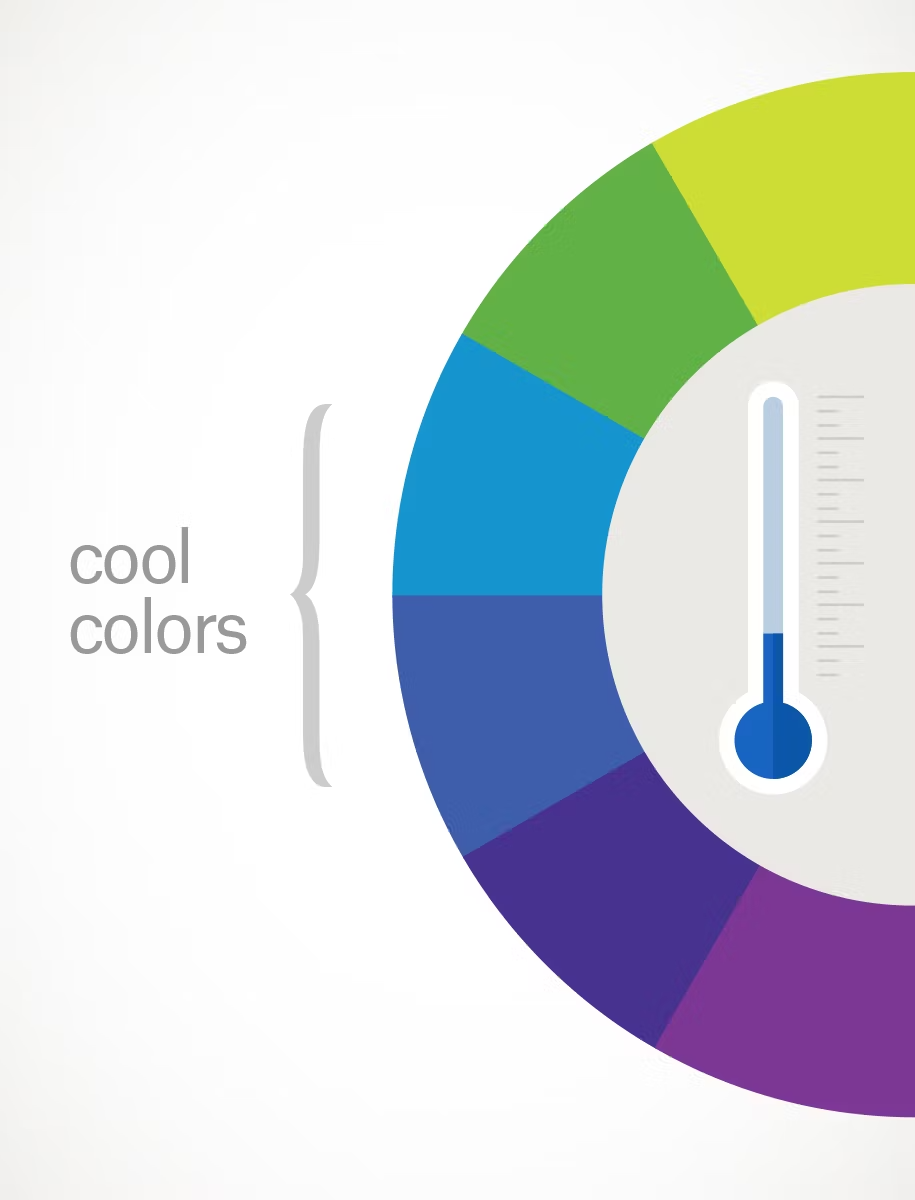
- Warm and Cool Colors: A line drawn through the center of the wheel separates the warm colors (reds, oranges, yellows) from the cool colors (blues, greens, purples).
- Warm colors are associated with energy, brightness, and action.
- Cool colors often evoke feelings of calm, peace, and serenity.
Warm Colors Cool Colors 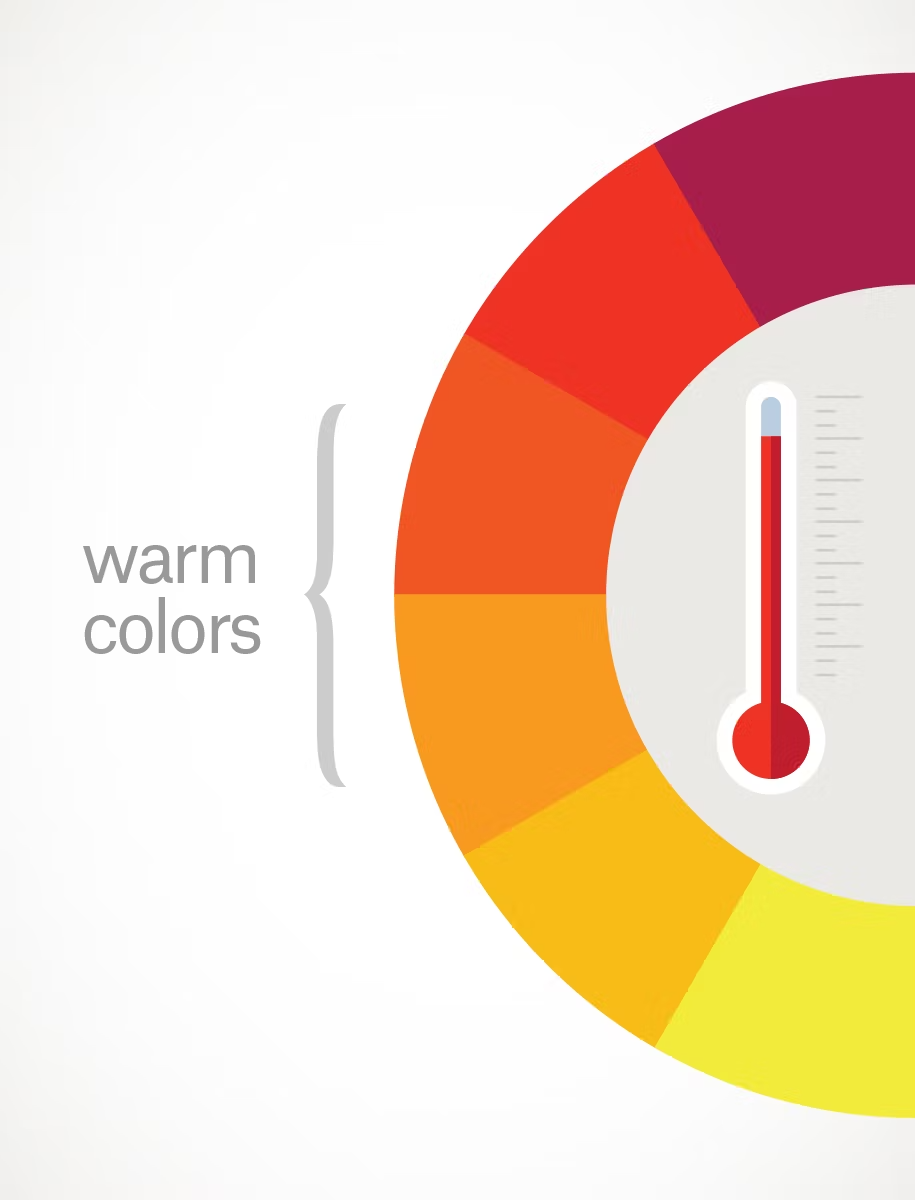
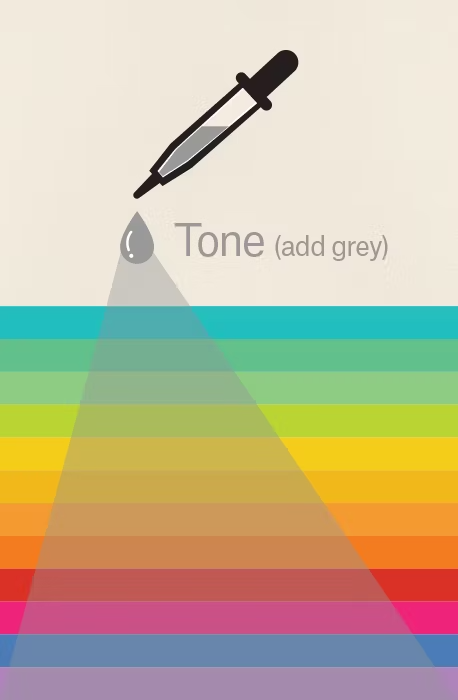
Hue, Shade, Tint, and Tone
These terms help us describe variations of a single color.
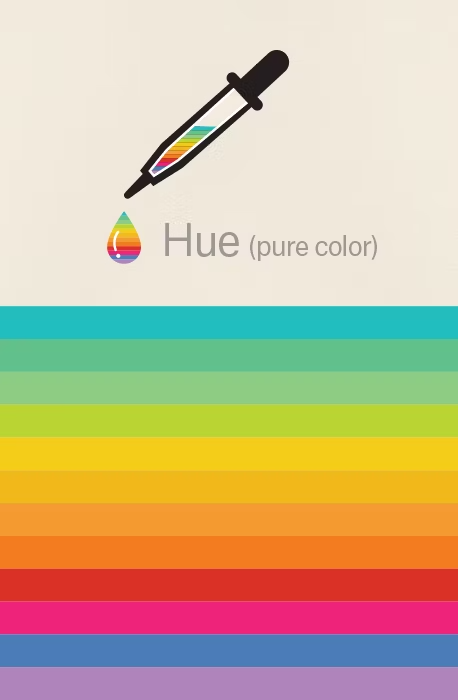
- Hue: A pure color from the color wheel.
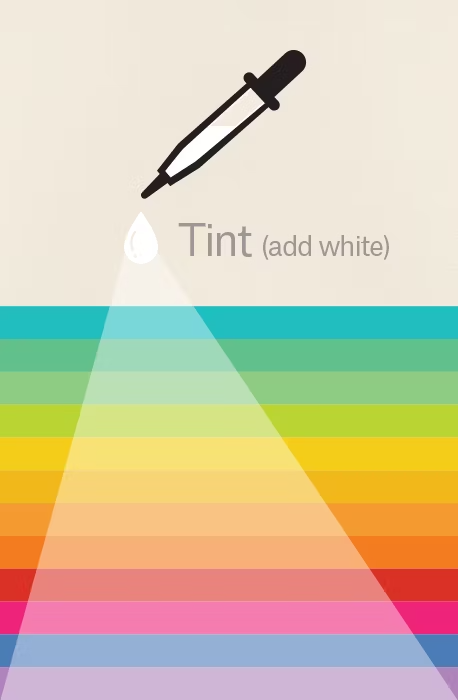
- Tint: A hue with white added (e.g., red + white = pink).
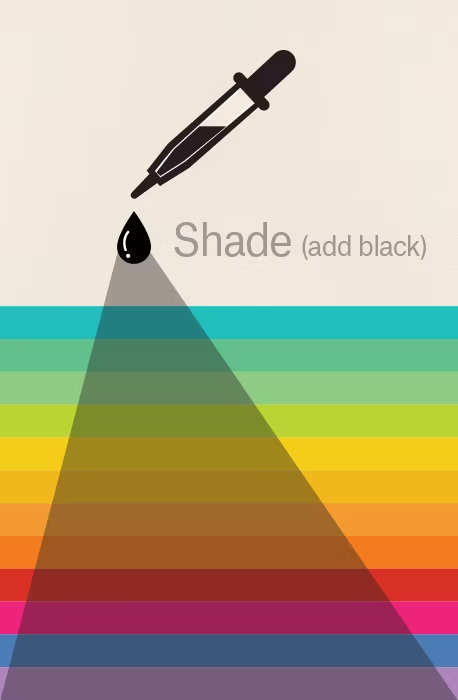
- Shade: A hue with black added (e.g., red + black = burgundy).
- Tone: A hue with grey (both black and white) added.
| Hue | Tint | Shade | Tone |
|---|---|---|---|
 |
 |
 |
 |
Basic Color Schemes
Here are a few simple, foolproof ways to create a color palette:
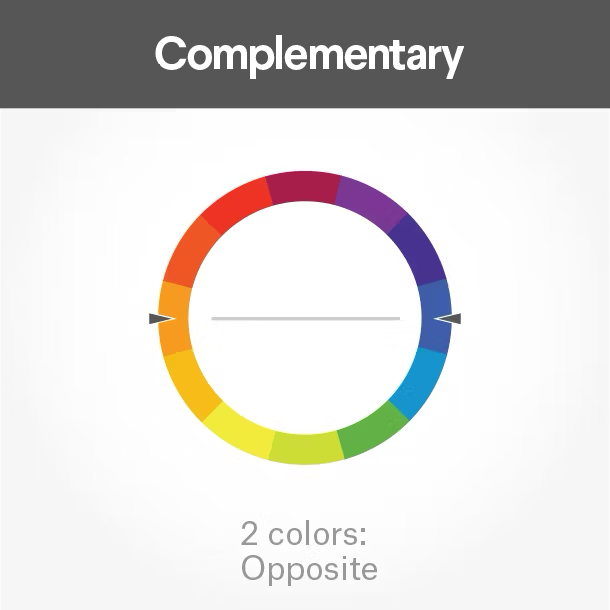
- Complementary: Two colors that are opposite each other on the color wheel.
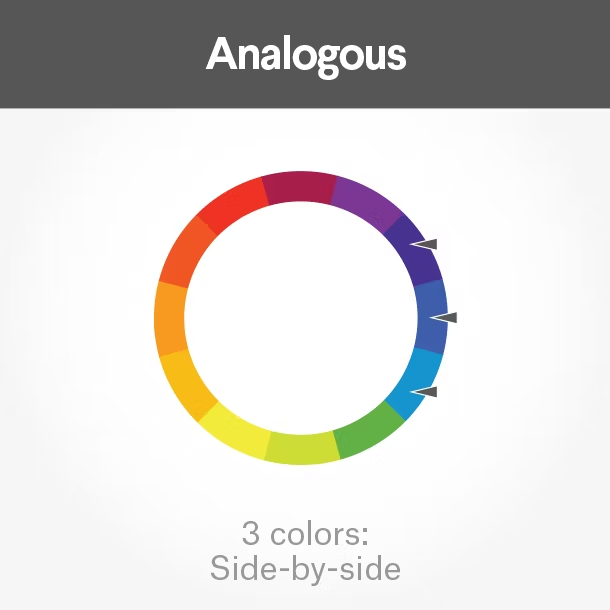
- Analogous: Three colors that are side-by-side on the color wheel.
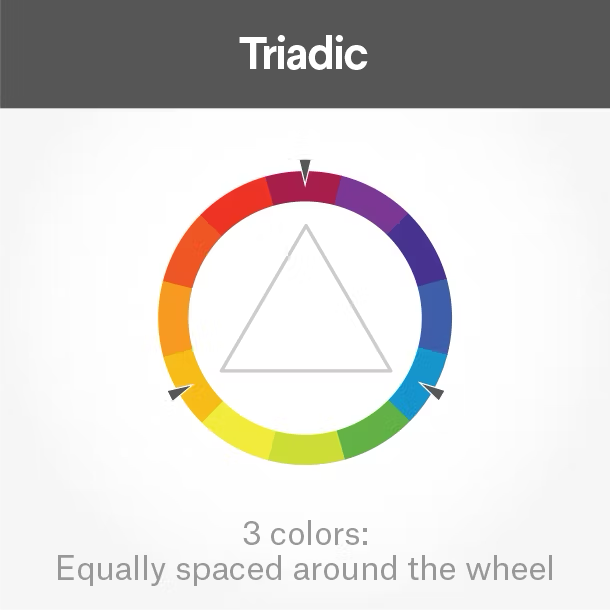
- Triadic: Three colors that are evenly spaced around the color wheel.
| Complementary | Analogous | Triadic |
|---|---|---|
 |
 |
 |
Part 2: Getting Started with Adobe Illustrator
Now that we’ve covered the basics of color, let’s jump into the tool that brings our ideas to life: Adobe Illustrator.
Setting Up Your Document
- To start, click ‘New File’. You can choose from various presets. For general digital work, navigate to the ‘Web’ tab.
- Ensure your workspace is set to “Essentials” from the top right to have a standard layout.
Understanding the Workspace: Artboard and Canvas
- Canvas: The large, typically grey area in the background.
- Artboard: The white, printable/exportable areas where you create your designs. You can have multiple artboards in a single document.
- Artboards can be edited using the ‘Edit Artboards’ button in the properties panel when no objects are selected. The artboard system is incredibly useful for creating multiple versions of a design or different assets for a single project.
Part 3: Your Illustrator Arsenal
Illustrator is packed with powerful tools. Mastering the essentials will dramatically speed up your workflow. Let’s walk through the most important ones.
Selection and Manipulation Tools
- Selection Tool (V): Functions as a typical cursor, allowing you to select, click, and drag objects and text around your screen.
- Direct Selection Tool (A): Allows you to individually select and edit specific anchor points of vector shapes or lines. Where the regular selection tool would select the entire shape, the Direct Selection Tool enables you to edit one angle, side, point, or curve at a time.
- Group Selection tool: Used to select and edit an object inside a group.
- Lasso Tool (Q): Allows you to draw around an area of points you want to select so that you can easily select several at a time.
Creation Tools
- Pen Tool (P): This is arguably the most important tool of the entire program. It allows you to click in your workspace to create anchor points. By clicking and dragging these anchor points, you can maneuver their “handles,” which give your paths curvature and shape. Connecting several anchor points with this tool allows you to create unique, hand-drawn vector shapes.
- Type Tool (T): This tool allows you to add text to your Illustrator document. You can either click on your artboard and begin typing—which allows you to type without any boundaries—or you can click and drag to create a text box, which will restrict your text to stay within that box.
- Area Type Tool: The area type tool allows you to convert an existing shape into a text box and type within it.
- Type on a Path Tool: This tool allows you to use an existing line or shape as a path to type on.
- Line Segment Tool (
\): This tool draws individual straight lines. If you hold down the shift key you can create a line at a 0, 45, or 90-degree angle. - Rectangle Tool (M): This tool creates squares and rectangles. If you want a perfect square you can hold down the shift key as you click and drag.
- Rounded Rectangle Tool: This tool works exactly the same as the rectangle tool, but the corners are rounded instead of squared.
- Ellipse Tool (L): This tool is used to create circles and ovals. To create a circle, hold down the shift key. If you want an oval, just click and drag.
- Polygon Tool: The polygon tool makes any number of sided shapes, from triangles to hexagons and beyond. With the tool selected, all you need to do is click once on your artboard and define how many sides you want your shape to have.
- Star Tool: This tool makes stars. With this tool, you can choose how many points you want your star to have.
- Flare Tool: This tool makes a weird multi-circular shape with some weird gradient flares.
Modification and Editing Tools
- Eraser Tool (Shift+E): The eraser tool erases sections of a vector object or path.
- Scissors Tool (C): The scissors tool can be used to cut apart a vector object or path.
- Knife Tool: The knife tool allows you to cut a shape by clicking and dragging the knife through the shape.
- Shape Builder Tool (Shift+M): This tool allows you to easily combine multiple, overlapping shapes in order to create one large, combined shape.
Part 4: Workflow and Efficiency
Working smart is just as important as knowing the tools. Here are some tips on organization and shortcuts.
Layers and Groups
- Groups (
Ctrl + G): Grouping allows you to treat multiple objects as a single unit. To ungroup, useShift + Ctrl + G. - Layers: Proper layer management is key for complex designs. It is recommended to go through Adobe’s Page on Layers for a deeper understanding.
Productivity Hacks
- Transform Again (
Ctrl + D): This shortcut allows you to repeat the previous action you did.
Essential Keyboard Shortcuts
Knowing your shortcuts is the fastest way to speed up your workflow. Here are some of the most common ones broken down by category:
Files
| Action | Shortcut |
|---|---|
| New | Ctrl + N |
| Open | Ctrl + O |
| Close | Ctrl + W |
| Save | Ctrl + S |
| Save As | Shift + Ctrl + S |
| Close All | Alt + Ctrl + W |
Tools
| Tool | Shortcut |
|---|---|
| Selection | V |
| Direct Selection | A |
| Lasso | Q |
| Pen | P |
| Type | T |
| Rectangle | M |
| Ellipse | L |
Basic Operations
| Action | Shortcut |
|---|---|
| Select All | Ctrl + A |
| Deselect | Shift + Ctrl + A |
| Cut | Ctrl + X |
| Copy | Ctrl + C |
| Paste | Ctrl + V |
| Paste in Front | Ctrl + F |
| Paste in Back | Ctrl + B |
| Undo | Ctrl + Z |
| Redo | Shift + Ctrl + Z |
Object Editing
| Action | Shortcut |
|---|---|
| Group | Ctrl + G |
| Ungroup | Shift + Ctrl + G |
| Bring to Front | Shift + Ctrl + ] |
| Send to Back | Shift + Ctrl + [ |
| Bring Forward | Ctrl + ] |
| Send Backward | Ctrl + [ |
| Transform Again | Ctrl + D |
| Join | Ctrl + J |
| Lock Selection | Ctrl + 2 |
| Unlock All | Alt + Ctrl + 2 |
Views and Navigation
| Action | Shortcut |
|---|---|
| Hand Tool | H |
| Zoom Tool | Z |
| Fit Artboard in Window | Ctrl + 0 |
| Fit All in Window | Alt + Ctrl + 0 |
| Actual Size | Ctrl + 1 |
Part 5: Advanced Illustrator Techniques
With the fundamentals down, let’s explore some of Illustrator’s more powerful features that can elevate your designs.
Image Trace: From Pixels to Vectors
Ever found a raster image (like a JPG or PNG) that you wish was a scalable vector? Image Trace is your solution. The task of manually tracing an image, can be done in a single click with this tool.
- Select the raster image on your artboard.
- Click ‘Image Trace’ in the Properties panel. The default setting often works well for simple images.
- Crucially, click ‘Expand’ to convert the trace into an editable vector object.
- You may need to ungroup (
Ctrl + Shift + G) the result to manipulate individual elements.
You can experiment with different presets like ‘3-color’, ‘6-color’, or ‘High Fidelity’ for more complex images. For a deeper dive, check out Adobe’s official guide on Image Trace.
Clipping Masks: Framing Your Content
A clipping mask is an object whose shape masks other artwork so that only the art within the shape is visible. Think of it as using one shape to create a window through which you can see another. Adobe’s page on Clipping Masks covers all the edge cases and is a great resource.
3D and Materials
Illustrator’s 3D tools allow you to add depth to your 2D designs. * The Inflate tool is especially fun and looks fantastic on text, giving it a soft, pillowy appearance. * You can also apply realistic materials to your 3D objects. For even more options, you can get additional resources from Adobe’s Substance 3D Assets page.
The Effects Gallery
Don’t overlook the Effects menu at the top. It contains a gallery of powerful effects like Grain, Gaussian Blur, and more. While they may seem like subtle changes, adding a texture like grain to a background can make it look far more interesting than a simple flat color.
Part 6: Automating Your Workflow
For repetitive tasks, automation is a game-changer. Illustrator provides powerful tools to save you hours of manual work.
Actions: Record and Replay
The Actions panel (Window > Actions) lets you record a sequence of commands and then play it back on any object. Think of it as creating your own custom shortcut.
Use Case: Imagine you have 50 icons that all need to be resized to 100x100 pixels, given a specific color, and exported as a PNG. Instead of doing this manually 50 times, you can: 1. Click ‘Create New Action’ in the Actions panel. 2. Hit ‘Begin Recording’. 3. Perform the sequence of tasks on one icon. 4. Stop recording. 5. Now, simply select any other icon and press the play button for your new action.
Variables: Data-Driven Graphics
This is one of the most powerful automation features, especially for personalized content. We used this to automatically generate materials with different texts from a single design. Here’s how it works:
- Prepare your Data: Create a CSV file (a spreadsheet) with the variable data. For different names, you would have one column titled “Name” with each person’s name in a new row.
- Set up the Illustrator Template: Create your design. For the text that will change (the name), use the Type Tool to create a placeholder text box.
- Define Variables:
- Open the Variables Panel (
Window > Variables). - Select the placeholder text object on your artboard.
- In the Variables panel, click ‘Make Text Dynamic’. This creates a new variable (e.g.,
variable1). Give it a clear name, like “RecipientName”.
- Open the Variables Panel (
- Import Data:
- From the Variables panel menu, click ‘Load Variable Library’ and select your CSV file.
- The data from your spreadsheet will be loaded as Data Sets. You can now toggle through the different names, and the text on your artboard will update automatically.
- Automate Export with Actions:
- Create a new Action.
- Record the steps:
File > Export > Export As..., save the file as a PNG or your desired format. - After the export step, add the “Next Data Set” command to your action by selecting it from the Actions panel menu.
- Stop recording.
- Run the Batch:
- From the Actions panel menu, select ‘Batch…’.
- Choose your Action, set the source to “Data Sets”, and pick a destination folder for your exported files.
- Click OK, and watch as Illustrator automatically generates a unique certificate for every name in your list.
Part 7: Exporting Your Masterpiece
Once your design is complete, you need to export it correctly.
- Go to
File > Export > Export As.... - In the export dialog, tick ‘Use Artboards’. This ensures you only export the content on your artboards, not the entire canvas. You can choose to export all artboards or a specific range.
- For PNGs: In the PNG Options window, set the Resolution to High (300 ppi) and Anti-aliasing to ‘Art Optimized (Supersampling)’ for the best quality. You can also select a transparent background here.
- For PDFs: To export a multi-page PDF where each artboard is a page, it’s best to use
File > Export > Export for Screens. Select PDF as the format and choose to export as a single file.
Tip for Laser Cutting
You can use Illustrator to create files for laser cutters. * Set your artboard size to match your physical material (e.g., MDF or acrylic sheet). * Create your design using strokes with no fill. * Export the file as a .dxf format, which is compatible with most laser cutting machines. This unlocks incredible possibilities, allowing you to use vector illustrations from sites like Freepik for physical projects.
Part 8: Design Resource List
Here is a curated list of tools and websites to help you on your design journey. Many of these were shared during our design meets and are fantastic for finding assets and inspiration.
Fonts
- Font Identifiers: Found a font you love but don’t know its name? These tools can help.
- Font Repositories: Free and premium fonts for your projects.
Vectors & Illustrations
Colors
- Tools for creating and discovering beautiful color palettes. You can screenshot a palette you like, paste it into Illustrator, and use the Eyedropper Tool to sample the colors.
Image Manipulation
- Quickly remove backgrounds from images.
Inspiration
Presentations
- Templates for your next slideshow.
Cool Stuff
- Explore the cutting edge of digital design.
- Spline (3D design in the browser)